【Maya C++】 C++を使ってset vertex colorのコマンド・プラグインを作ってみる【2日目】
こんにちはMaya Python Advent Calenda 2020の2日目の記事です
今回は C++を使ってset vertex colorのコマンド・プラグインを作ってみるの第2回目となります
全記事一覧です
【Maya C++】 C++を使ってset vertex colorのコマンド・プラグインを作ってみる【1日目】 【Maya C++】 C++を使ってset vertex colorのコマンド・プラグインを作ってみる【2日目】
前回の記事ではsetVertexColor;とscriptEditorで実行すると赤色にvertexcolorをつけれるようにしました
前回までのコードは下をコードをコピペするか自分で写経したものをお使いください
#include <maya\MPxCommand.h>
#include <maya\MFnPlugin.h>
#include <maya\MArgList.h>
#include <maya\MGlobal.h>
#include <maya\MSelectionList.h>
#include <maya\MDagPath.h>
#include <maya\MItSelectionList.h>
#include <maya\MFnMesh.h>
#include <maya\MColor.h>
#include <maya\MColorArray.h>

class setVertexColor : public MPxCommand
{
public:
    virtual MStatus doIt(const MArgList& args);
    static void *creator() { return new setVertexColor; }
};

MStatus setVertexColor::doIt(const MArgList &args)
{
    MSelectionList selList;
    MGlobal::getActiveSelectionList(selList);
    MDagPath dagPath;
    MItSelectionList dag(selList);
    selList.getDagPath(0, dagPath);
    MFnMesh mesh(dagPath);
    MStringArray colorSetArray;
    mesh.getColorSetNames(colorSetArray);
    unsigned int size = colorSetArray.length();
    if (size == 0) {
        mesh.createColorSet(MString(colorSet));
        mesh.setCurrentColorSetName(MString(colorSet));
    }

    MItSelectionList iter(selList, MFn::kMesh);
    for (; !iter.isDone(); iter.next()) {
        iter.getDagPath(dagPath);
        MFnMesh meshFn;
        meshFn.setObject(dagPath);
        MFnDependencyNode dnFn = dagPath.node();

        MColorArray vertexColorList;
        meshFn.getVertexColors(vertexColorList);

        int LenVertexList = vertexColorList.length();
        vertexColorList.setLength(LenVertexList);

        MIntArray vertexIndexList;
        for (signed int count = 0; count < LenVertexList; count++) {
            vertexColorList.set(MColor(MColor::kRGB, 1.0, 0, 0, 1.0), count);
            vertexIndexList.append(count);
        }

        meshFn.setVertexColors(vertexColorList, vertexIndexList, 0, MFnMesh::MColorRepresentation::kRGB);
    }
    return MS::kSuccess;
}

MStatus initializePlugin(MObject obj)
{
    MFnPlugin plugin(obj, UnPySide, 1.0, Any);

    MStatus stat;
    stat = plugin.registerCommand(setVertexColor, setVertexColor::creator);
    if (!stat)
        stat.perror(registerCommand failed);
    return MS::kSuccess;
}

MStatus uninitializePlugin(MObject obj)
{
    MFnPlugin plugin(obj);

    MStatus stat;
    stat = plugin.deregisterCommand(setVertexColor);

    if (!stat)
        stat.perror(deregisterCommand failed);
    return MS::kSuccess;
}
newSyntaxメソッドを作成し、構文オブジェクトであるMSyntaxを返すスタティックメソッドを作成する必要があるため、setVertexColorクラスにnewSyntaxを追加します
#include <maya\MPxCommand.h>
//~~~~~~~~~~
#include <maya\MSyntax.h>

class setVertexColor : public MPxCommand
{
public:
    virtual MStatus doIt(const MArgList& args);
    static void *creator() { return new setVertexColor; }
    static MSyntax newSyntax();
};MSyntaxクラスはコマンドにおけるパラメータを記述する便利な方法でフラグセットを定義できます
ショートフラグとロングフラグの両方を定義していきます
//~~~~~~~~~~

class setVertexColor : public MPxCommand
{
public:
    virtual MStatus doIt(const MArgList& args);
    static void *creator() { return new setVertexColor; }
    static MSyntax newSyntax();
};

const char *redFlag = -r, *redLongFlag = -redChannel;
const char *greenFlag = -g, *greenLongFlag = -greenChannel;
const char *blueFlag = -b, *blueLongFlag = -blueChannel;
const char *alphaFlag = -a, *alphaLongFlag = -alphaChannel;
//~~~~~~~~~~
newSyntax関数ではフラグの引数のデータ型を記述でき、addFlag関数に最高で6種類の異なる方のデータを引数にすることができます 今回はそこまでは必要ないのでdoubleのみ受け付けるように設定します
//~~~~~~~~~~
const char *alphaFlag = -a, *alphaLongFlag = -alphaChannel;

MSyntax setVertexColor::newSyntax() {
    MSyntax syntax;
    syntax.addFlag(redFlag, redLongFlag, MSyntax::kDouble);
    syntax.addFlag(greenFlag, greenLongFlag, MSyntax::kDouble);
    syntax.addFlag(blueFlag, blueLongFlag, MSyntax::kDouble);
    syntax.addFlag(alphaFlag, alphaLongFlag, MSyntax::kDouble);
    return syntax;
}
//~~~~~~~~~~
プラグインのクラスの中のメソッド doIt() で実行時にisFlagSetで設定したフラグが使用されているかどうか調べる為に使用しています
getFlagArgumentは設定したフラグに対して要求されたフラグの値をMSelectionListとして取得しています
ただ、フラグの設定をしていない場合値が存在しないことになってしまうので
初期値としてrgbaそれぞれに対して1.0fを宣言しておきます
//~~~~~~~~~~
#include <maya\MSyntax.h>
#include <maya\MArgDatabase.h>
//~~~~~~~~~~
MSyntax setVertexColor::newSyntax() {
    //~~~~~~~~~~
}

MStatus setVertexColor::doIt(const MArgList &args)
{
    double red = 1.0f;
    double green = 1.0f;
    double blue = 1.0f;
    double alpha = 1.0f;
    MArgDatabase argData(syntax(), args);
    if (argData.isFlagSet(redFlag)) {
        argData.getFlagArgument(redFlag, 0, red);
    }
    if (argData.isFlagSet(greenFlag)) {
        argData.getFlagArgument(greenFlag, 0, green);
    }
    if (argData.isFlagSet(blueFlag)) {
        argData.getFlagArgument(blueFlag, 0, blue);
    }
    if (argData.isFlagSet(alphaFlag)) {
        argData.getFlagArgument(alphaFlag, 0, alpha);
    }
//~~~~~~~~~~フラグの設定ができたのでvertexColorList.set(MColor(MColor::kRGB, 1.0, 0, 0, 1.0), count);にそれぞれの対応する関数を指定します
//~~~~~~~~~~
MStatus setVertexColor::doIt(const MArgList &args)
{
  //~~~~~~~~~~
    MItSelectionList iter(selList, MFn::kMesh);
    for (; !iter.isDone(); iter.next()) {
        //~~~~~~~~~~
        MIntArray vertexIndexList;
        for (signed int count = 0; count < LenVertexList; count++) {
            vertexColorList.set(MColor(MColor::kRGB, red, green, blue, alpha), count);
            vertexIndexList.append(count);
        }

        meshFn.setVertexColors(vertexColorList, vertexIndexList, 0, MFnMesh::MColorRepresentation::kRGB);
    }
    return MS::kSuccess;
}MSyntaxを使っていることをマヤに認識させる必要があるのでinitializePluginのregisterCommand関数の引数にsetVertexColor::newSyntaxを記述します
//~~~~~~~~~~
MStatus initializePlugin(MObject obj)
{
    MFnPlugin plugin(obj, UnPySide, 1.0, Any);

    MStatus stat;
    stat = plugin.registerCommand(setVertexColor, setVertexColor::creator, setVertexColor::newSyntax);
    if (!stat)
        stat.perror(registerCommand failed);
    return MS::kSuccess;
}
//~~~~~~~~~~
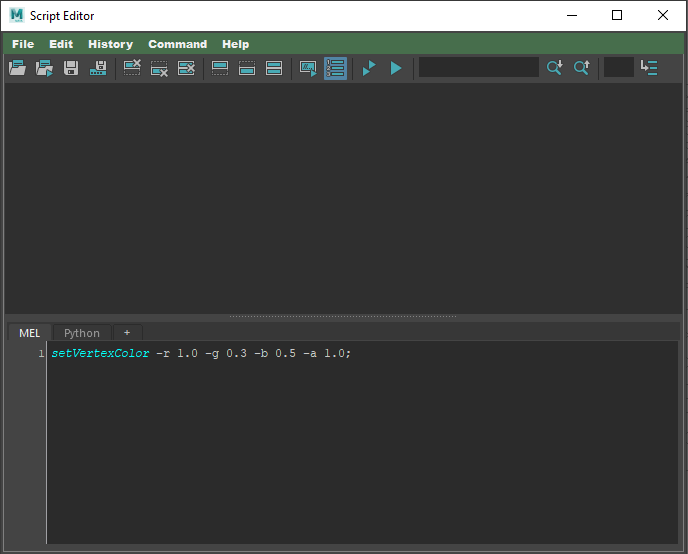
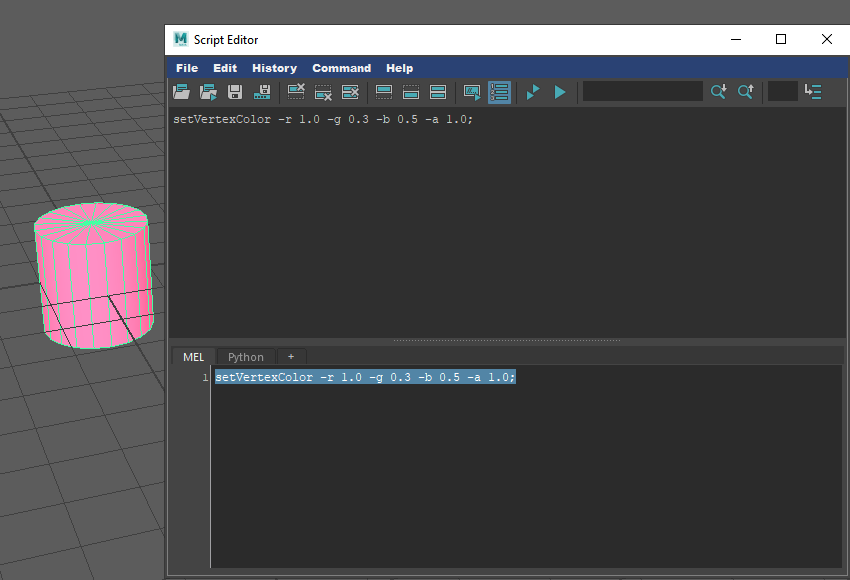
一度この状態でビルドし、maya上で下のコードを実行してみます
setVertexColor -r 1.0 -g 0.3 -b 0.5 -a 1.0;実行後、Color Set Editor>Display>All>Color in Shaded Display On


しかしこの状態では実行後にひと手間かかるため自動的にDisplayされるように設定します
メッシュノードが頂点の色を表示するかどうかを設定するにはMStatus setDisplayColors ( bool enable )を使用するといいです ですので頂点カラーを設定した後にコードを記述しておきましょう
//~~~~~~~~~~
MStatus setVertexColor::doIt(const MArgList &args)
{
    //~~~~~~~~~~
    for (; !iter.isDone(); iter.next()) {
        //~~~~~~~~~~
        meshFn.setVertexColors(vertexColorList, vertexIndexList, 0, MFnMesh::MColorRepresentation::kRGB);
        meshFn.setDisplayColors(true);
    }
    return MS::kSuccess;
}
//~~~~~~~~~~
ビルドするして再度プラグインを読み込み実行すると実行後にvertexColorがディスプレイ表示されています
Maya Python Advent Calendar 2020の14日目は、h_kishimotoさんのArnoldでレンダリング→デノイズを自動化するです


ディスカッション
コメント一覧
まだ、コメントがありません